Break and Retest Trading: Location, Entry and Invalidation
Learn how to read a break and retest within a larger range, define invalidation, and avoid chasing a move after the useful entry has passed.
4 min read
Break and retest trading starts with a level price has already respected. Price moves through it, comes back, and holds on the other side. The trading decision comes from that response and the risk you can define around it.
Before looking for the entry, mark the larger range. Its high, low and midpoint tell you where the smaller pattern sits. The same five-minute breakout can offer very different room to a target depending on whether it begins near the range low or just below the range high.
What counts as a break and retest?
For a bullish setup, look for price to move above a boundary and then return toward it. Former resistance needs to behave as support. For a bearish setup, the sequence reverses: price breaks below support and a return to that area fails.
Decide what a held retest means in your own entry rules before trading it. You might use the reclaim of a local swing, a smaller structure break, or an established entry method. Touching the line alone does not settle the question.
If price moves outside the range and quickly returns inside, the breakout premise needs another look. That response may belong to the sweep-and-retest setup. Do not relabel a failed trade while leaving its risk open.
Nasdaq example: the smaller pattern inside the larger map
In Stoic Edge Weekly 01, the Nasdaq example around 6:35–9:30 shows why location comes first. The September 14 chart is a historical review.
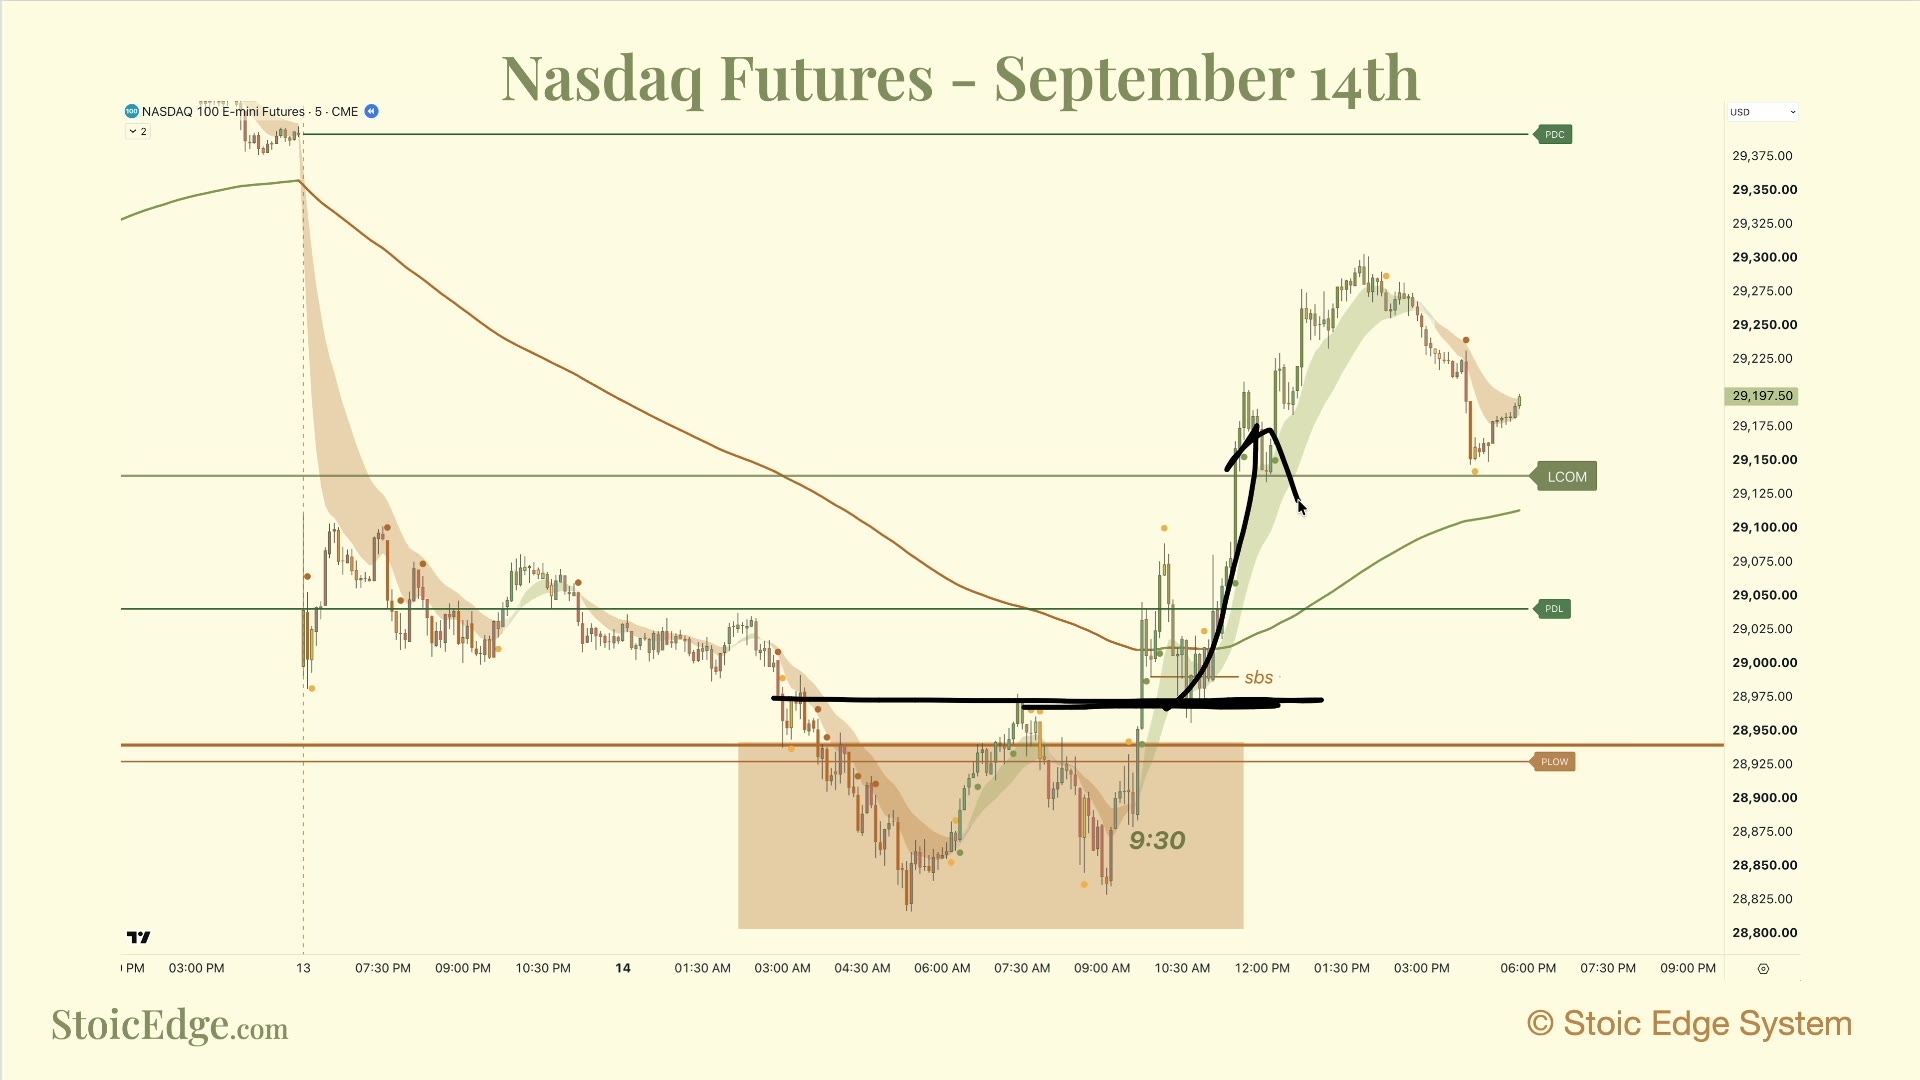
Price trades below a larger boundary before reclaiming it. The discussion then moves into the smaller chart: a local base forms, price breaks above local resistance, and the return gives a place to assess whether that level holds.
There are two scales here. The larger boundary provides context for a sweep and reclaim. The local break and retest provides one possible way to enter that response. Treating the small breakout as a completely separate trade would lose the reason for watching that area.
This example shows a chart sequence. It does not establish a win rate or document a particular fill.
Define the risk before the entry
Write down the condition that would invalidate the setup. In the example, the local swing beneath the entry area is a reference for the bullish idea. Your actual stop must fit the instrument and the setup you are trading.
Then compare the distance to that stop with the room to your first objective. Position size follows the loss you have chosen to accept. Moving the stop closer just to make the trade look attractive changes the trade.
Use the stop-loss guide if you need a fuller explanation of invalidation and position size.
Match the target to the range you are trading
After a sweep and reclaim of the parent range, the midpoint and opposite boundary are the reference objectives. After a break and held retest outside the parent range, the Range Model uses one and two range heights as projected objectives.
The local break and retest can be an entry within either situation. Identify which range supplies the trade's objective before you calculate a target.
The range profit-target guide explains that distinction with a second Nasdaq example.
When to pass
If price leaves without a usable retest, there may be no entry under your rules. If the nearest obstacle leaves little room, the clean-looking pattern may still be a poor fit. Repeated movement back through the boundary can also leave the original premise unresolved.
You can wait for a clearer response or move on. Chasing a candle does not recover the risk you could have defined earlier.
Watch the chart walkthrough
Watch the complete episode with selected moments, or open the Nasdaq entry discussion at 6:35 on YouTube.
For the full framework, start with the Stoic Range Model. These are historical educational examples; the target and entry rules still need testing for your market and execution.
Stoic Edge provides education. Historical examples and practice exercises do not establish future performance.
Watch the source videos
Study the original demonstrations alongside this guide. Recording dates and historical context appear on each video page.
Put the Lesson Into Practice
Study the course, keep notes and review trades in Stoic Journal beta, and learn alongside the Stoic Traders community.
Compare monthly and yearly course access before joining on Skool. Compass is included while monthly membership is active; yearly Premium includes lifetime course and Compass access. You can also get Stoic Edge Compass separately.
